Git & Github
for researchers
17 December 2025
Pre-trip checklist
You already have:
-
- Students and educational/research staff: GitHub Education
- Research/lab groups or courses: GitHub Organizations
-
GitinstalledRandRStudio(orPositron) up-to-date
help question done

Roadtrip agenda
- Big-picture motivation (and a pinch of ranting)
- Why would a researcher use a version control system (e.g.,
Git)? - What’s the point of hosting your work online (e.g., on
GitHub)?
- Why would a researcher use a version control system (e.g.,
- Useful
Git/GitHubconcepts I keep in my purse - Getting started (the right way): configuration climbing
- Early
Gitwins: some basic workflows for everyday life
- The rest of the game: some lesser-known fun things you can do with
Github- e.g.
Github Pages,Search, andActions
- e.g.
Part 1
Excuse me, do you have a moment to talk about
version control ?
Scientific progress
Principle
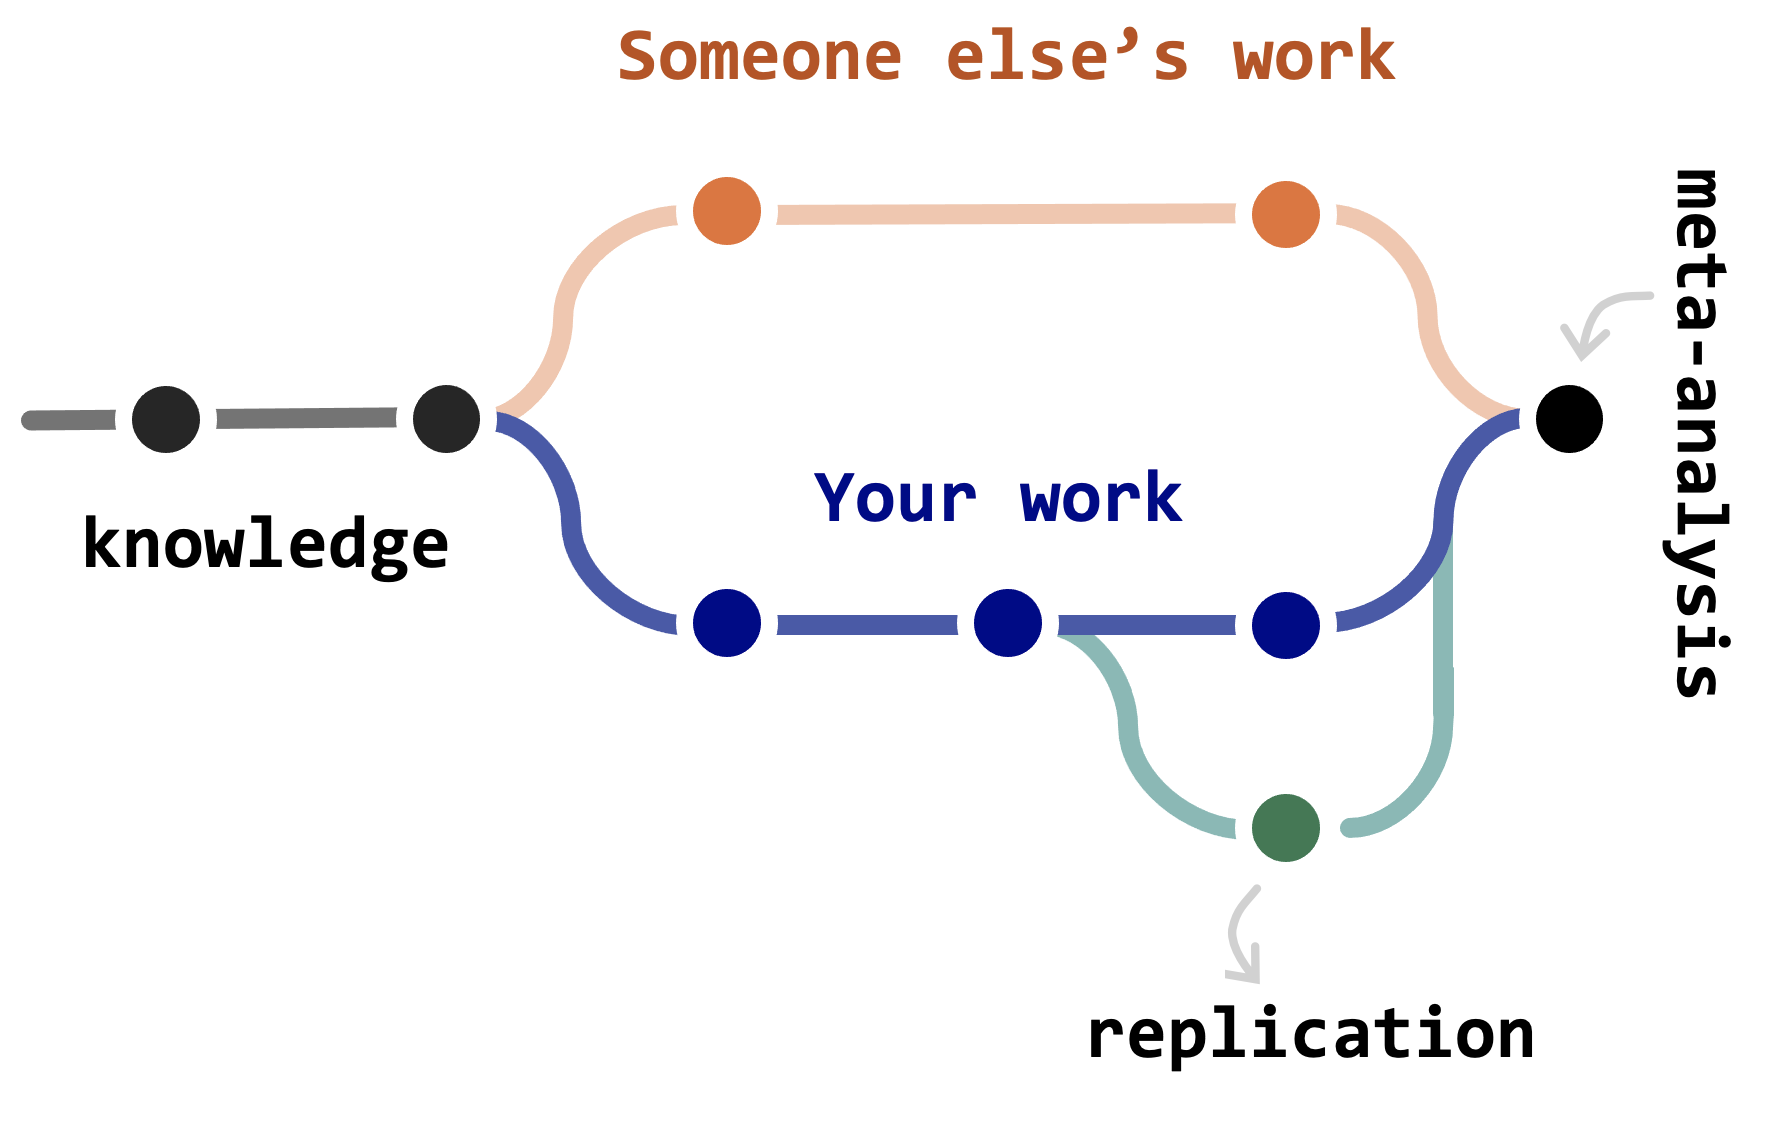
Reality

Why bother with all this?
I can think of two main reasons:
The noble reasons
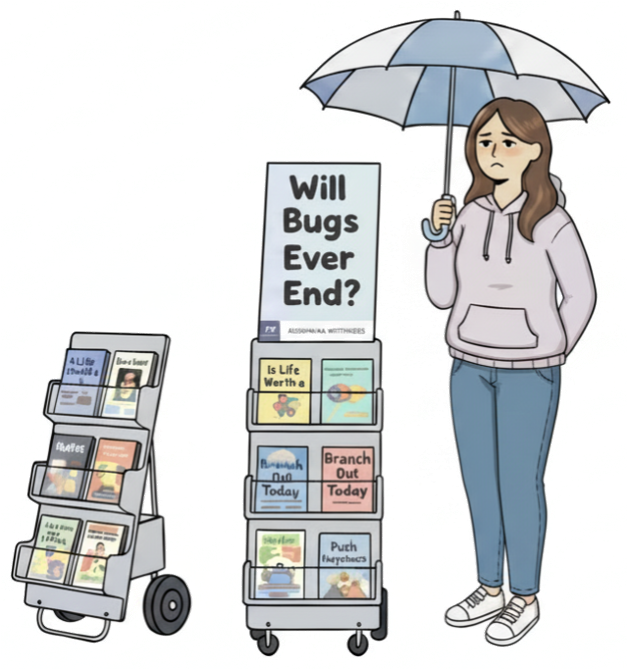
Science is in bad shape people.
Replicability and traceability of scientific claims is horrifyingly insufficient, across fields.
You analysis is the scientific product, the paper is just advertisement.
And analyses should (in principle)
be directly accessible to others,
or at least carefully
documented…
The selfish reasons
Research produces many files: data files, figures, tables, docs, slides, and (yes) code…
Most of these files evolve over the course of a project and often need to be shared with others.
Without explicit and structured management, project organization can easily descend into chaos, and taking your mental wellbeing with it (ask me how I know…)
The “poor man’s version” of version control
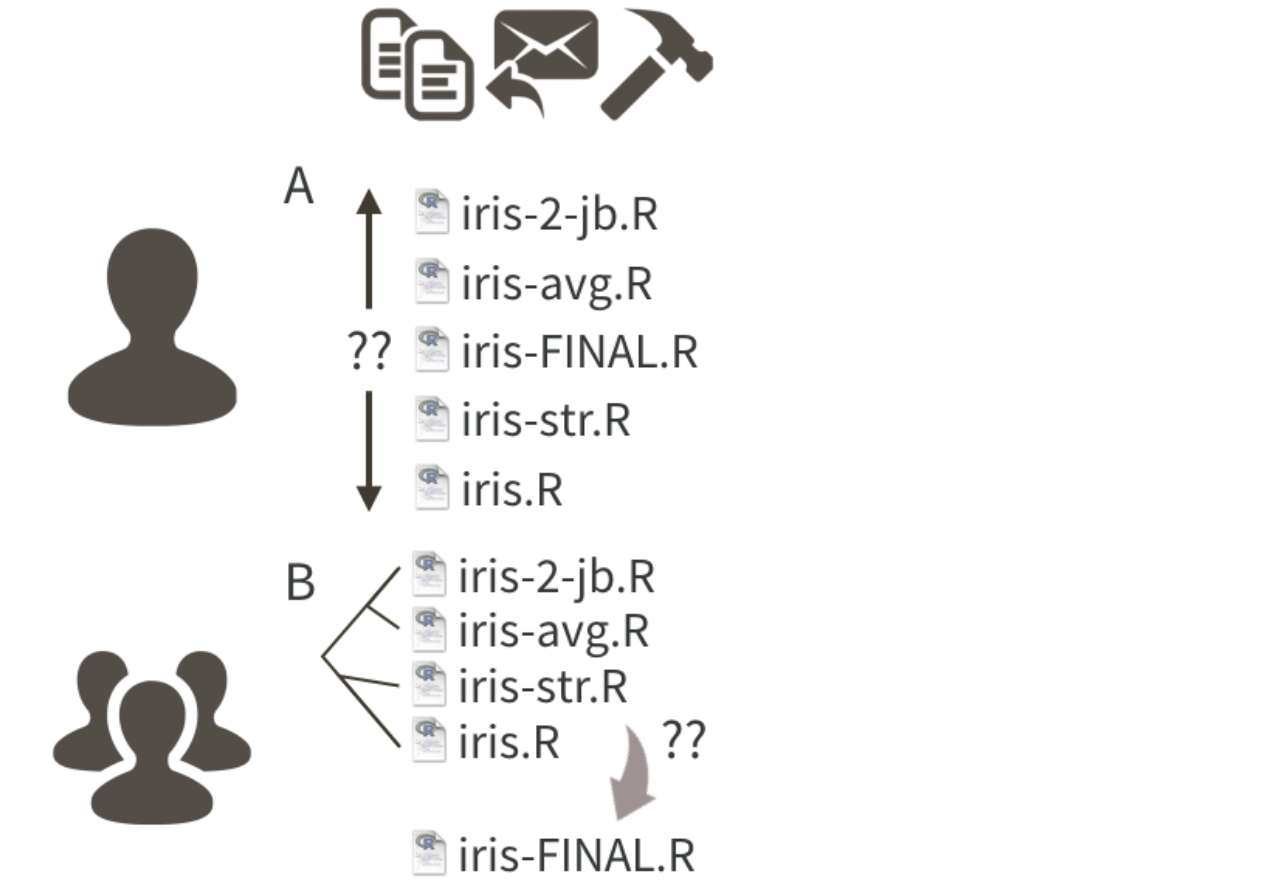
This unhappy result can be avoided by repurposing tools and workflows from the software development world.
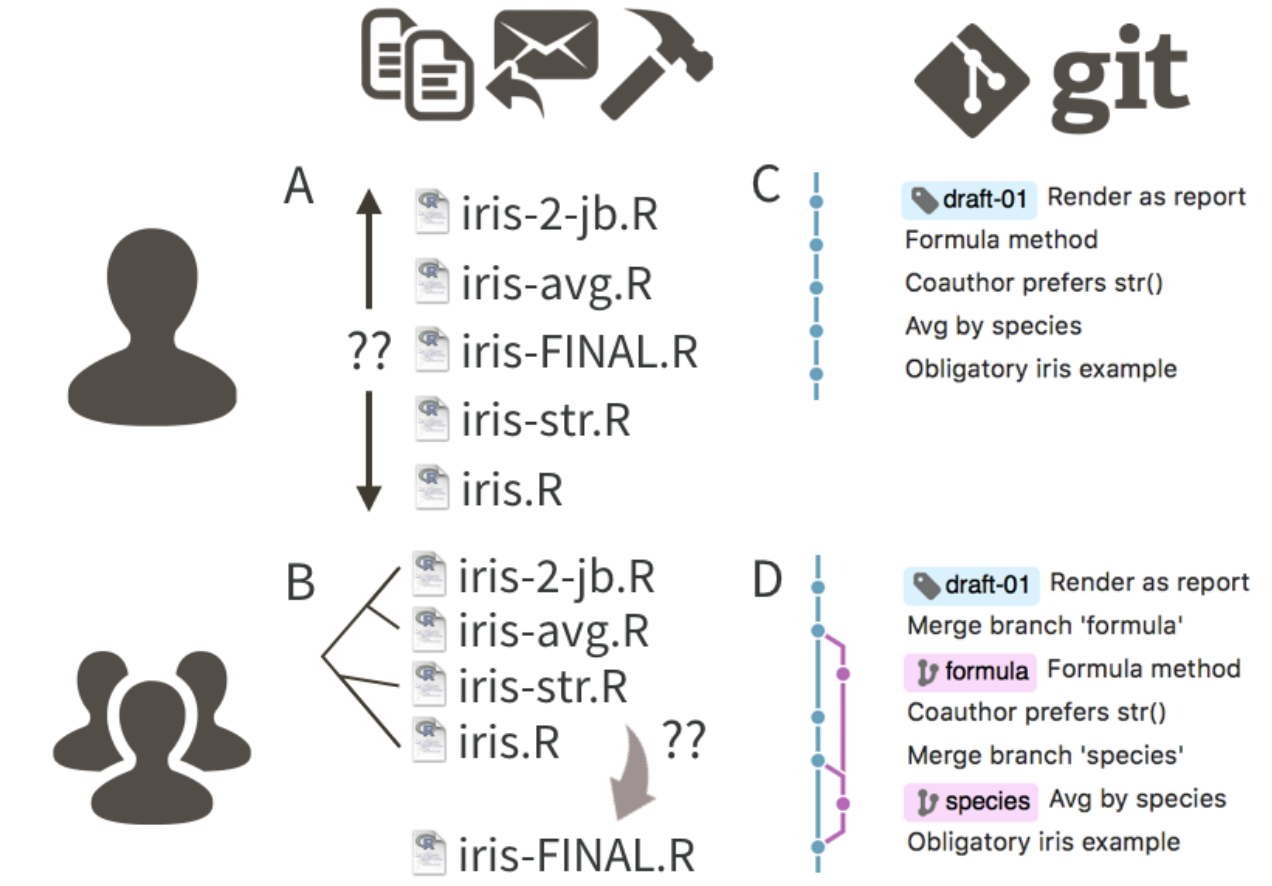
What is Git?

Git is a version control system.
It manages the evolution of a set of files (a repository or repo) in a sane, highly structured way.
Git’s original purpose was to help groups of developers work collaboratively on big software projects.
It is like a “TrackChanges” feature from Microsoft Word, but more rigorous, powerful, and scaled up to multiple files.
It enables the distribution of any file across different people, computers, and across time.
Now the bad news
Git was not built for you.
You will undoubtedly notice this, so it’s best to know in advance.

Git’s model of file management can feel uncomfortably rigid, especially for beginners.
Happily, there are many helpful tools that mediate your interactions with Git.
![]()
![]()
![]()
![]()
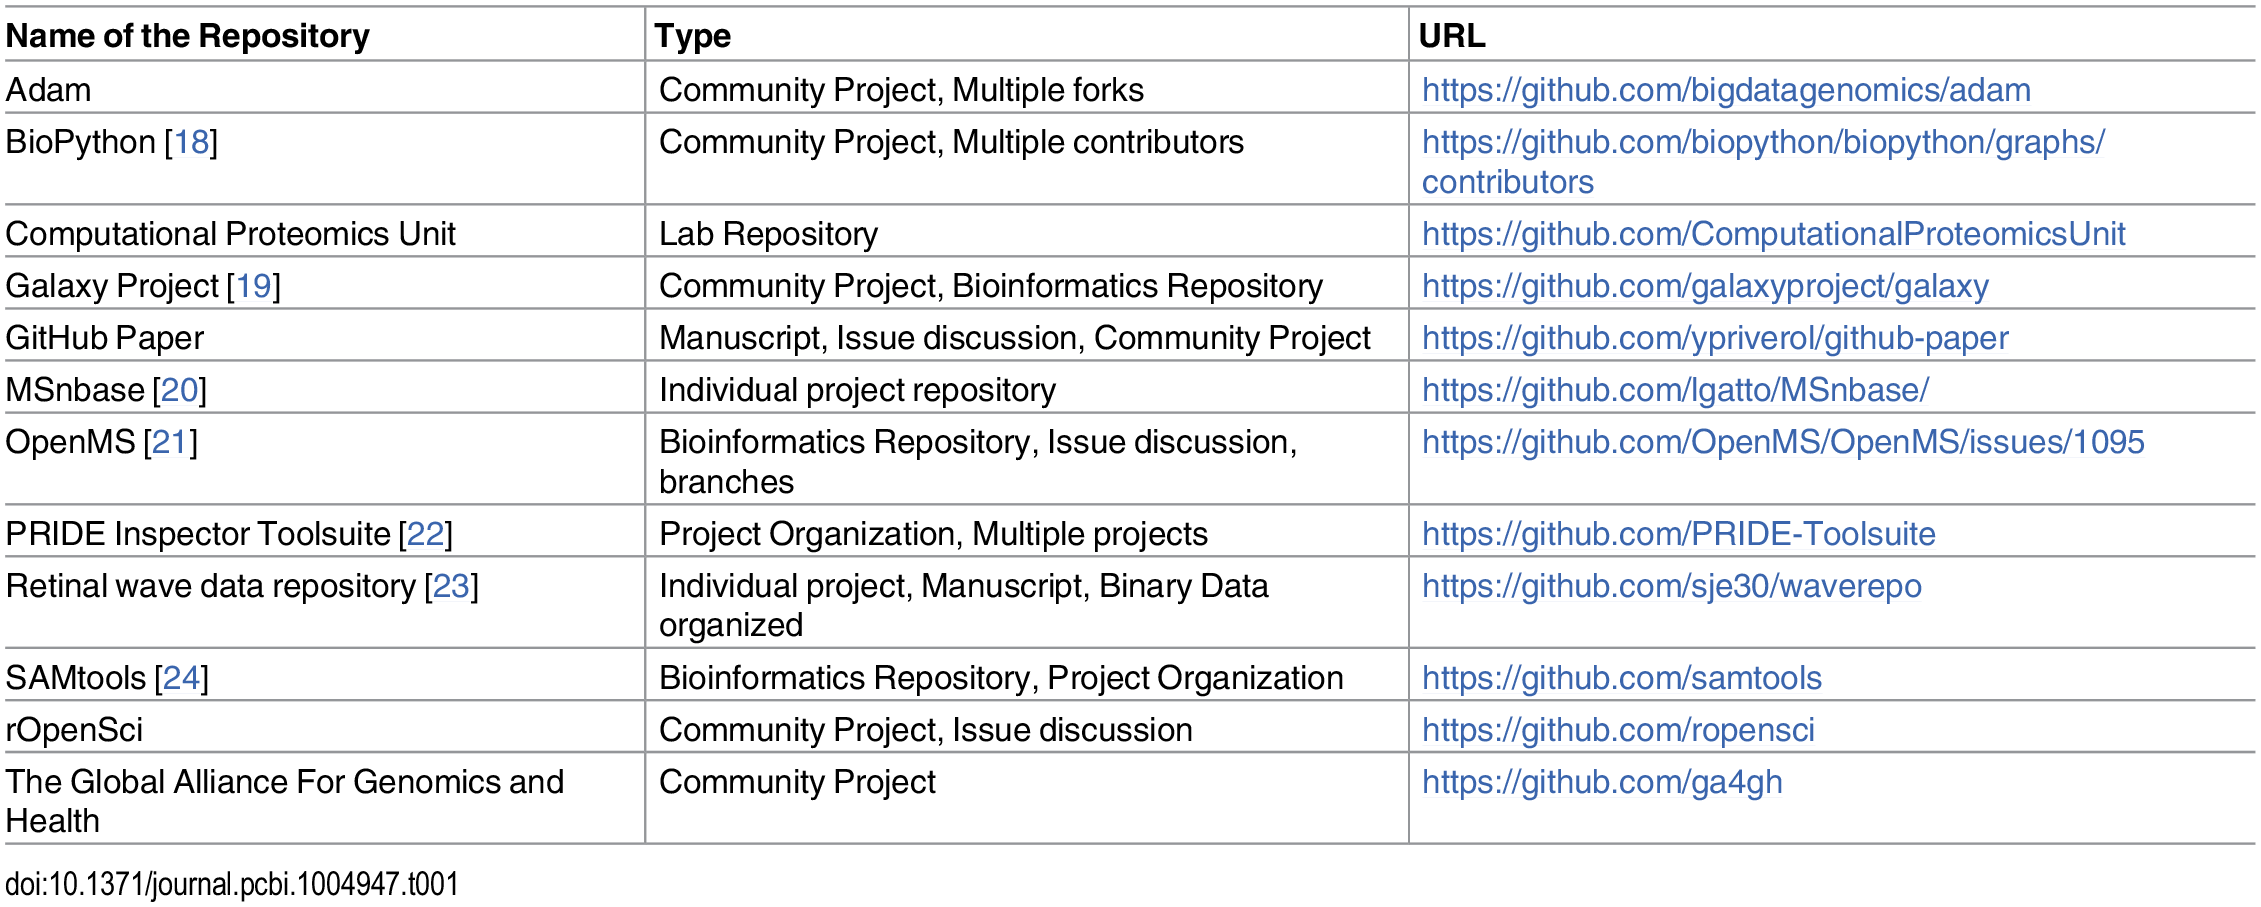
Some nice examples from bio-research
A diverse range of efforts (from individual, to labs, to global collaborations) have chosen GitHub as productive place to share code and ideas
Part 2
FundamentalGit / GitHub concepts and jargon

Git basics
Let’s talk a bit more about Git.
In this section we will:
- introduce the most important basic ideas
- define some
Gitvocabulary - link each concept to research-related tasks or projects
Keep in mind that actual usage is the most effective way to build up a good mental model for Git, so don’t worry if some concept don’t feel so clear just yet
Once again, there many excellent external Resources at the end of the presenation.
Commits
A commit is a snapshot of one or more files inside a repository.
Instead of saving a copy of a file, versioning it chaging it’s name (e.g. “[…] _v2” or “[…] _SD”), you create a commit.
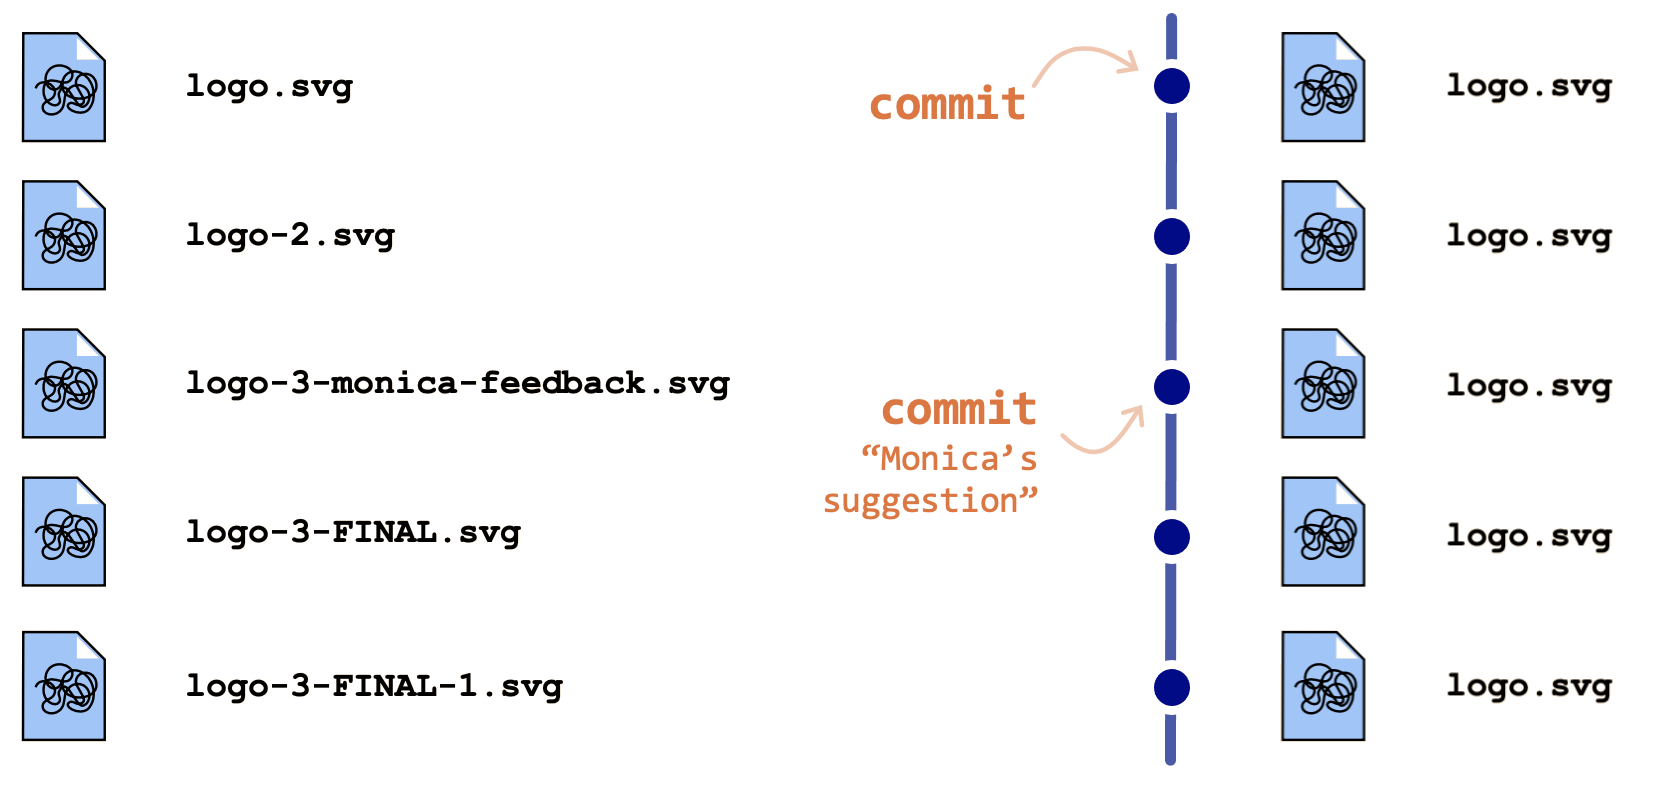
On the surface nothing changes, but the history of that file is secretly saved, including metadata (e.g. author, date, message)
You can add information about the changes you made in a commit message
Time travel: hashs and tags
Commits help you tell the story of your project (to yourself and to other people).
But it does not end there… Git also lets you time travel through your project.
Getting the files from a commit in the past is known as doing a check out
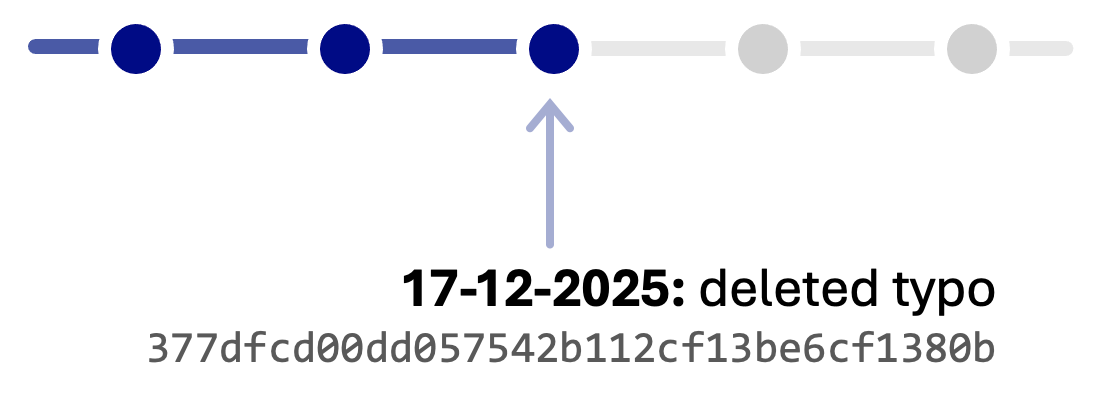
Recall: each commit has a unique ID called a hash.
You can tell Git what commit I want to check out using (part of) the commit hash.
My other commits still exist, but when I look in my repo, it’s as if they never happened.
You can also give certain commits a special name (a tag) that you can then use to refer to them during time travel e.g. people often use tags for software versions.
Parallel universes: branches
So far, everything has been very linear and ordered. The thing is… this isn’t really how projects work.
Sometimes you want to try something out, make experiments.
The way you do this in Git is with branches
A branch is a moveable label attached to a commit.
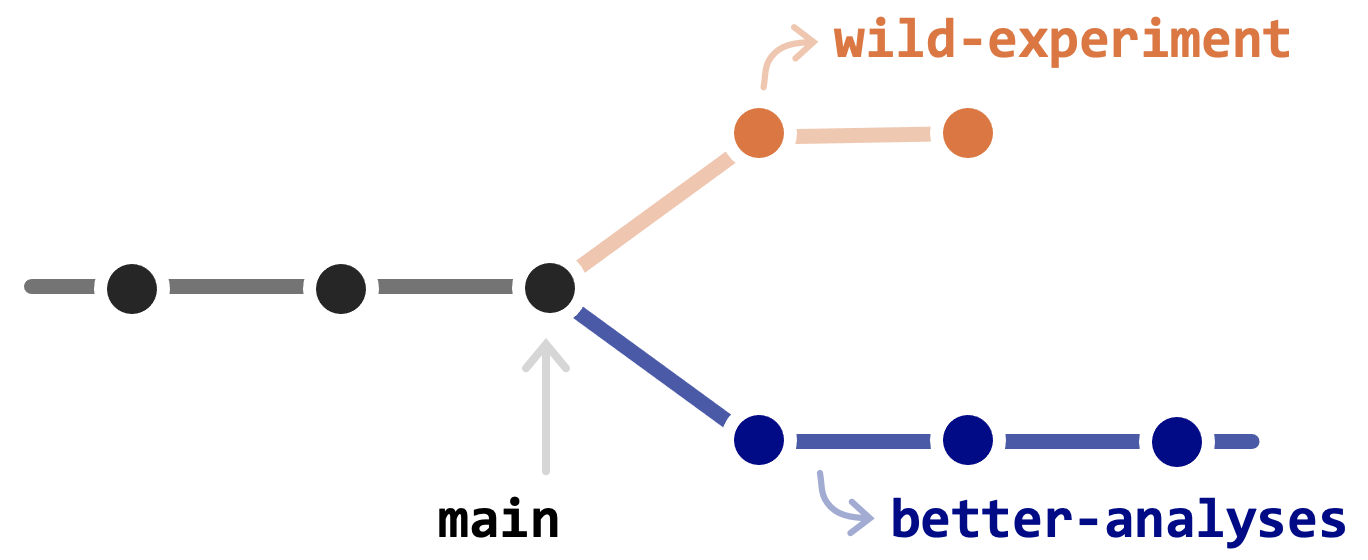
The default branch name in Git is main (not master!)
It’s common for the main branch to hold a stable version of the code or files, while other branches contain work in progress.
Quantum collapse: merging
Branches are easy to throw away if you decide you don’t like your changes.
But if you are happy with some work, you typically want to combine it back into the main branch.
To get changes from one branch into another, you merge them.
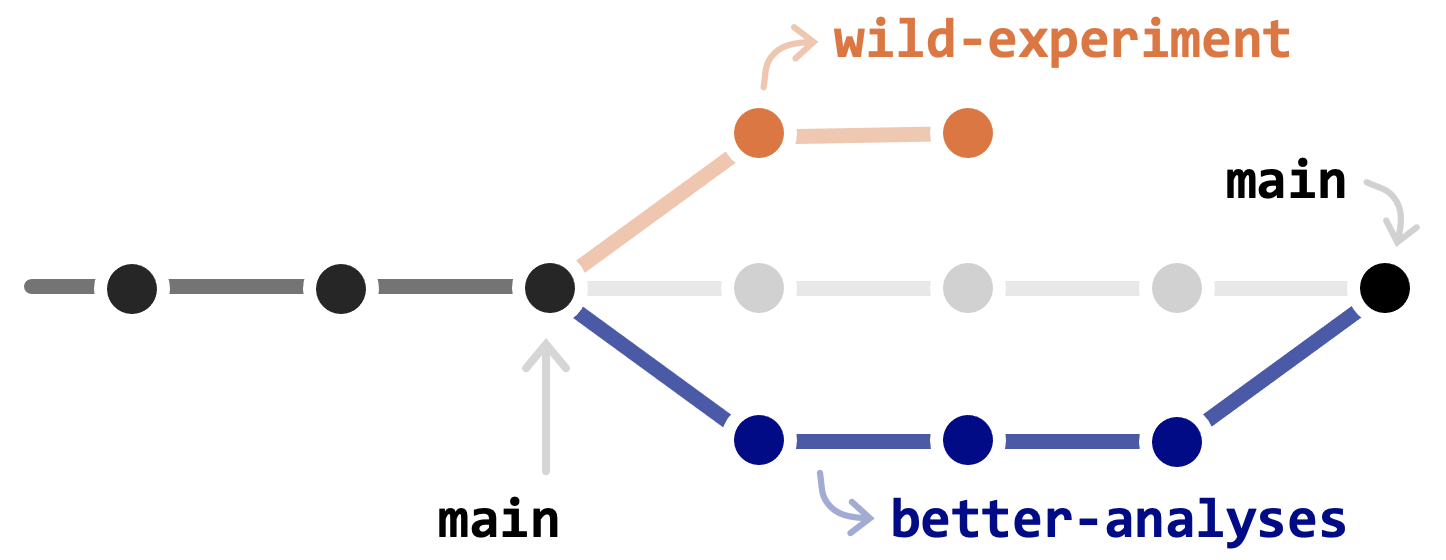
This last commit is a combination of all of the commits from both branches.
* Different collaborators can work on different branches independently!
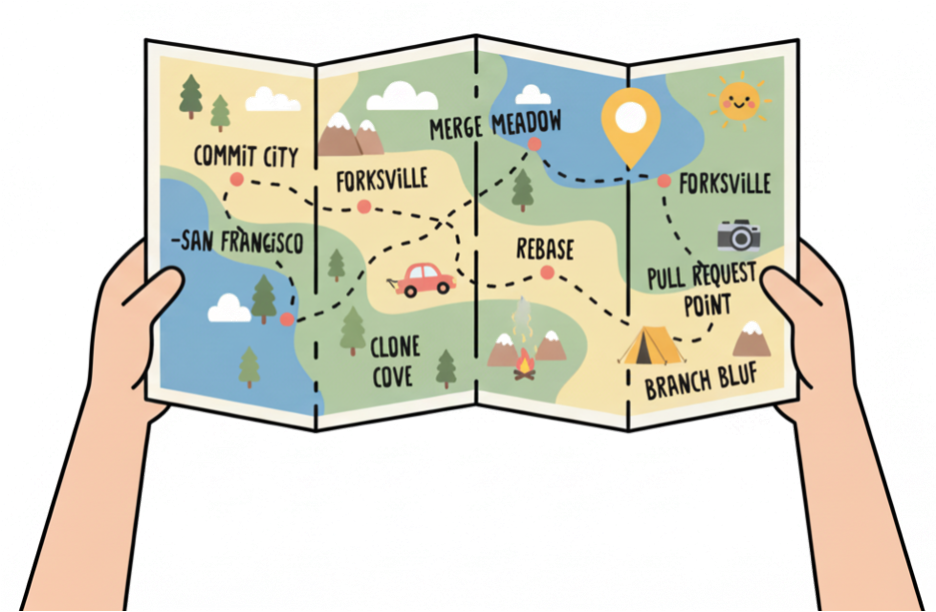
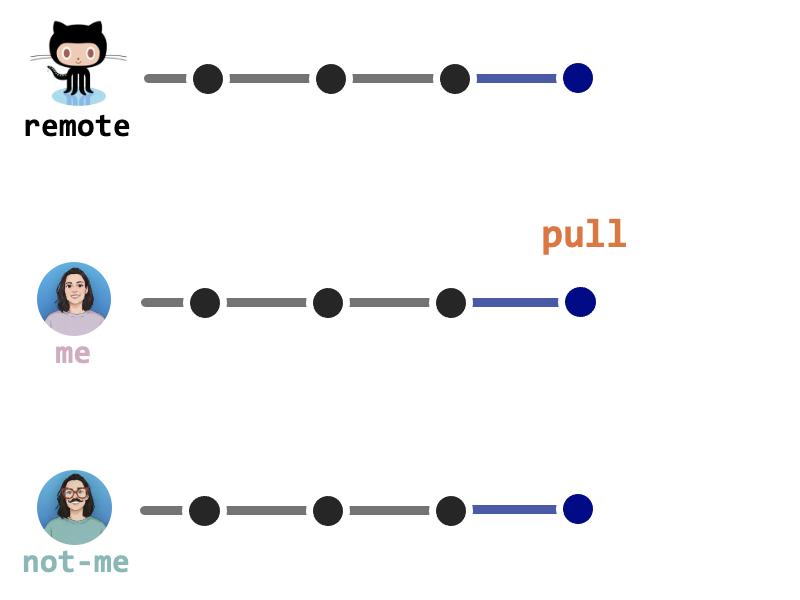
Working with (your) remotes: cloning, pushing and pulling
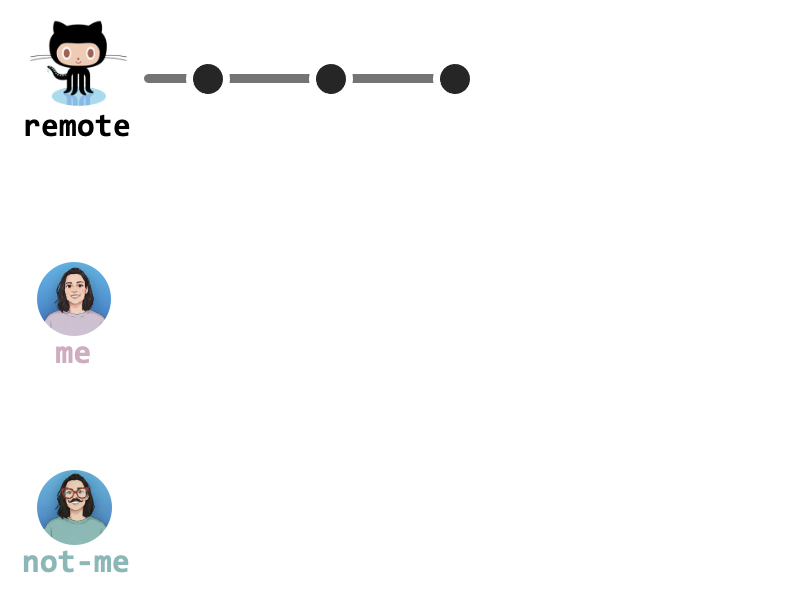
To get some work from a remote on your local computer (for the first time) you clone it.
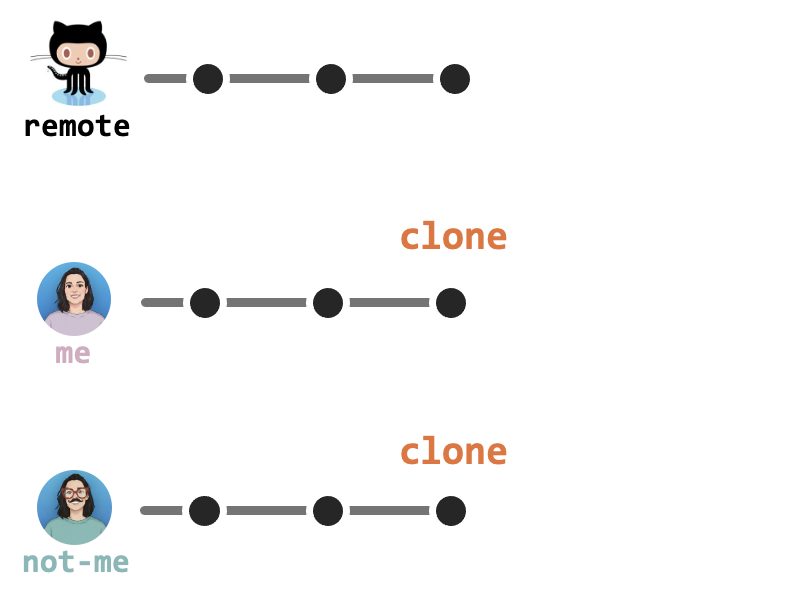
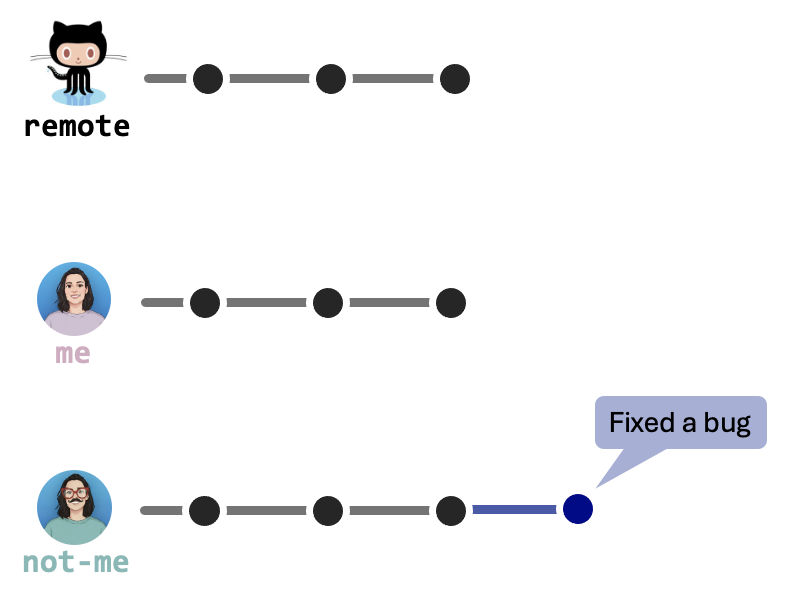
To send new updates to the remote you push
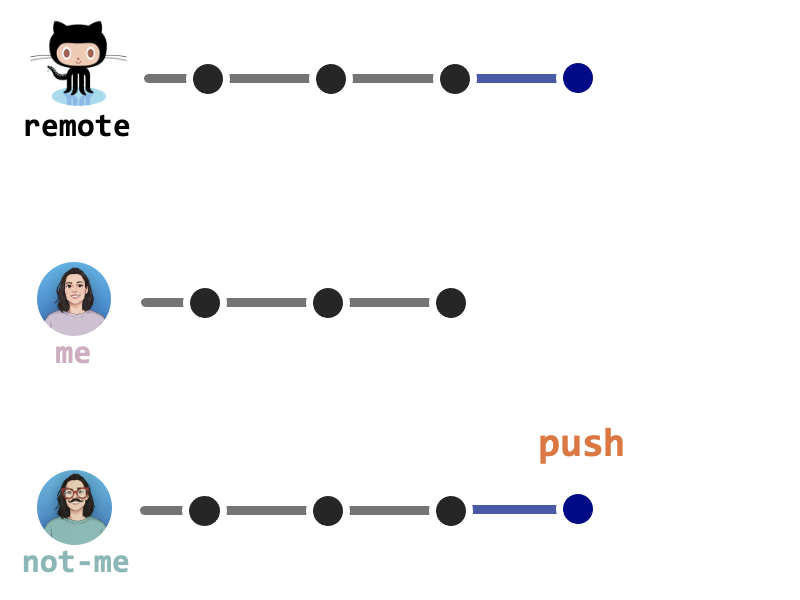
To get new updates (commits) from the remote you pull
Working with someone else’s repo: forking and pull requests
Cloning is a client-side Git operation: it creates a local copy of a remote repo.
When you are not a collaborator on the original repo (e.g., open-source contributions), you usually want your own independent remote to work with.
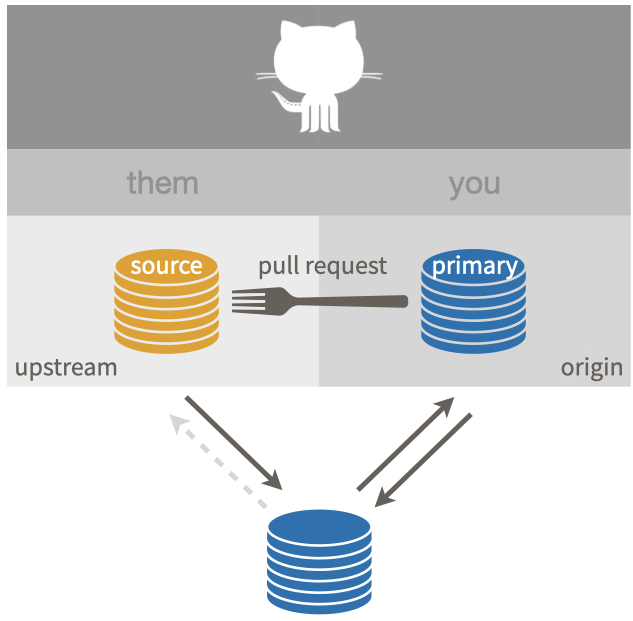
Forking creates a new remote copy of someone else’s repo (the upstream repo), under your user.
To propose changes back to the original, you’ll use a pull request (PR) instead of pushing directly.
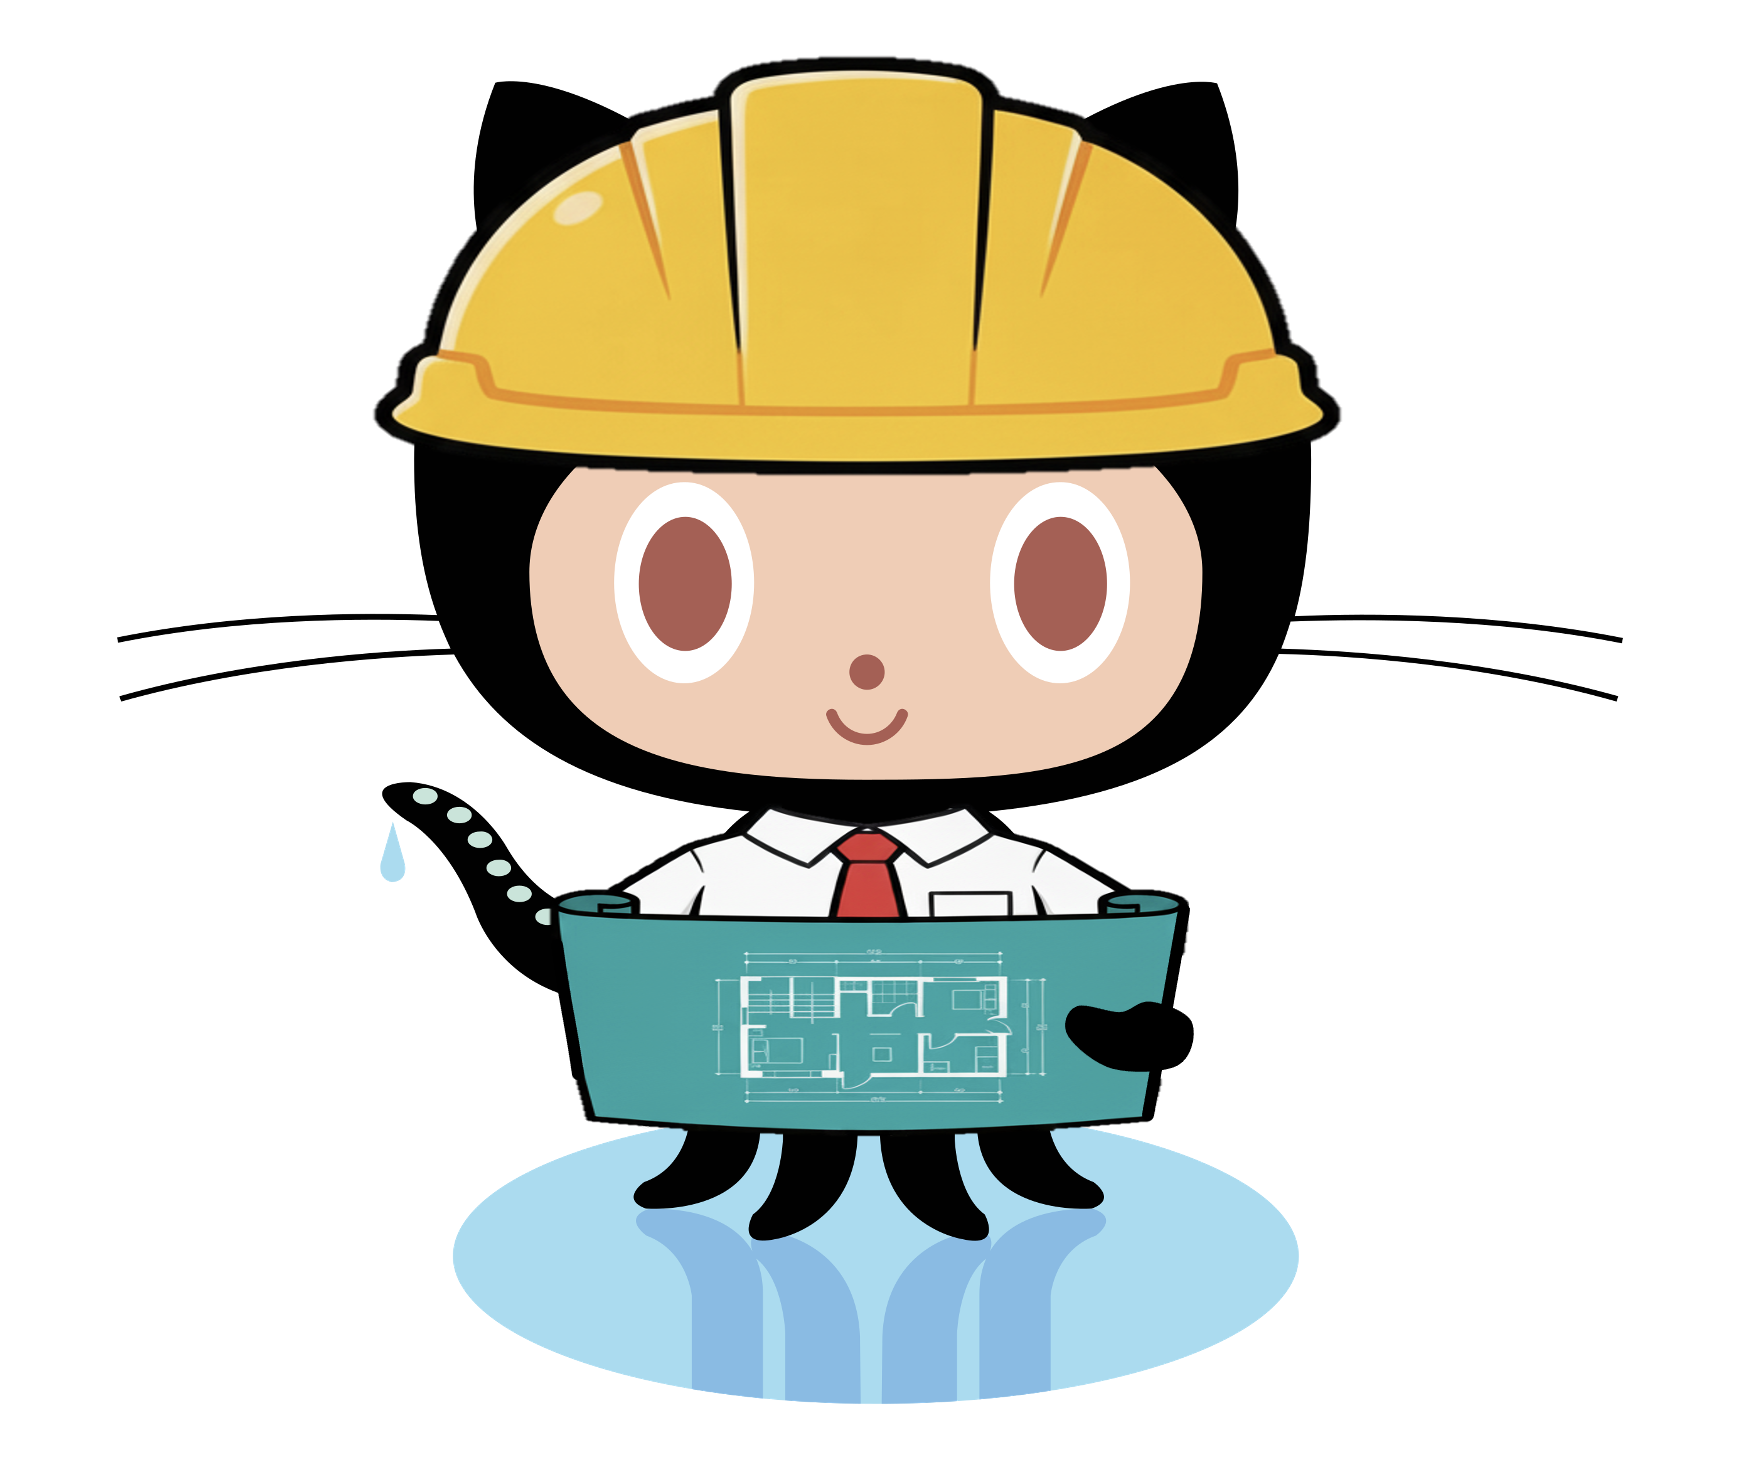
Bonus: fun fact
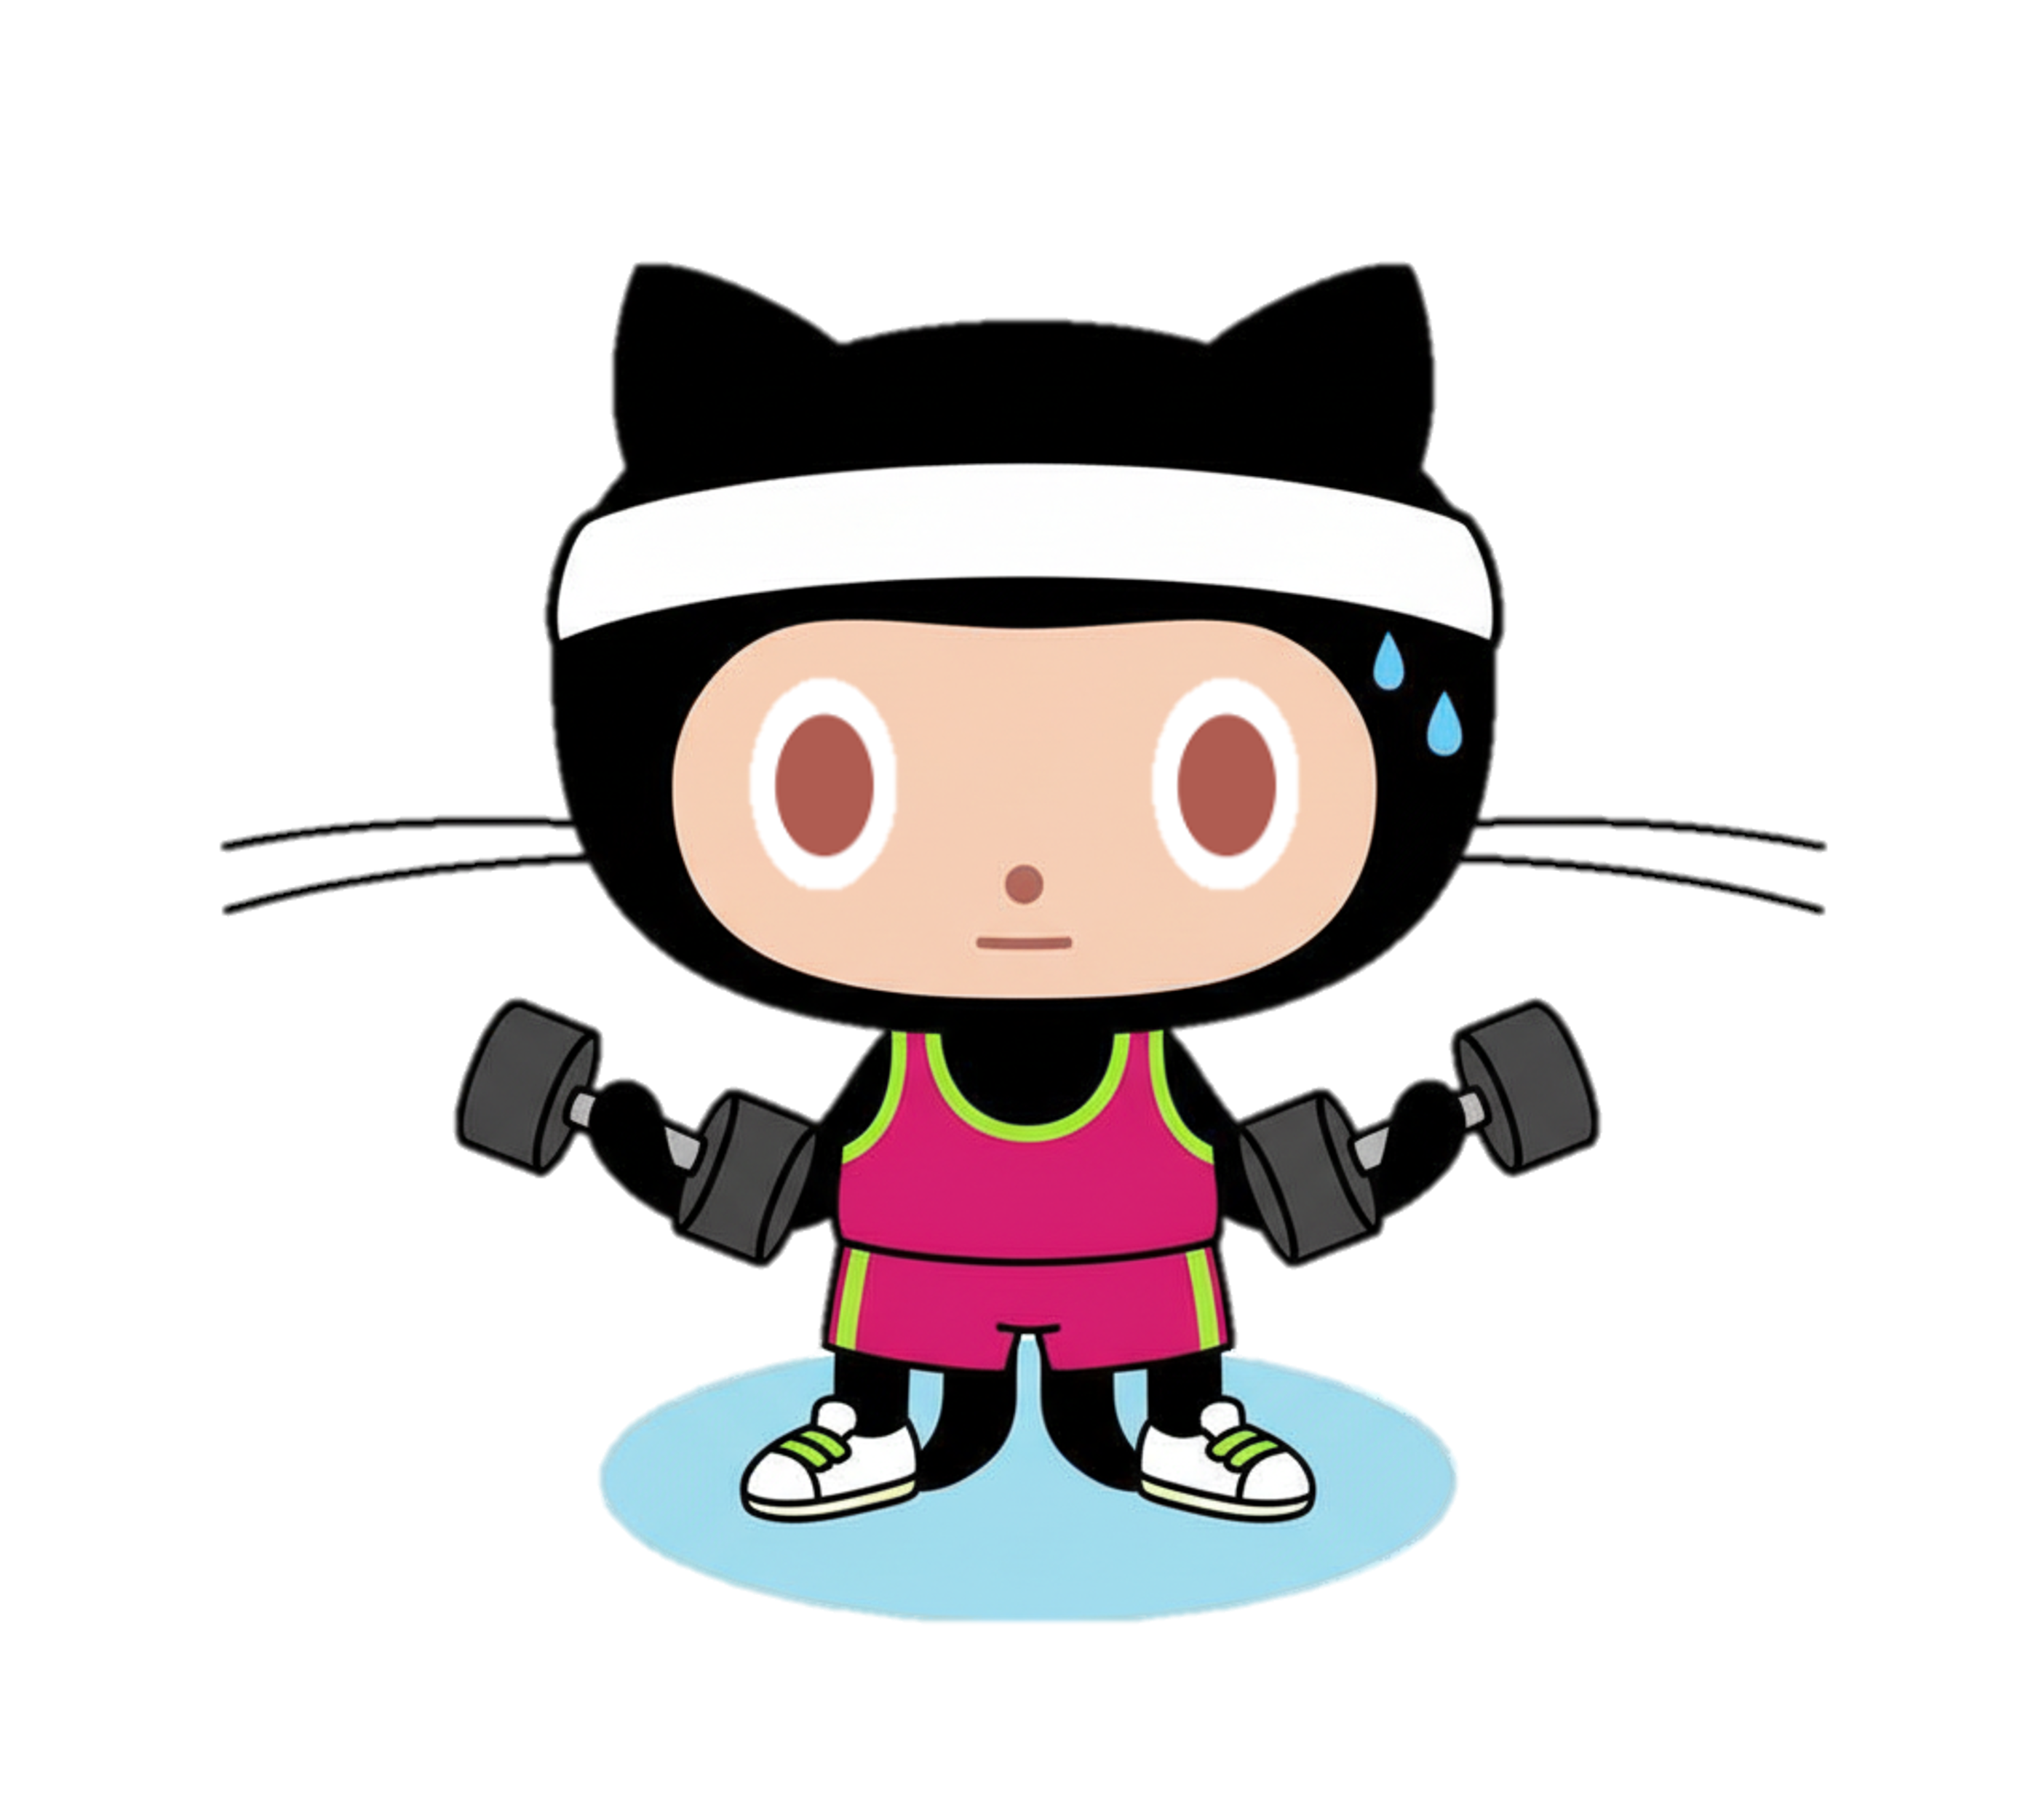
The GitHub mascot is named Octocat, a merge between an octopuss and cat.
Do you know the story behind this logo creation?
The idea came from the “octopus merge” – the practice of combining three or more branches of development.
The logo was created by Simon Oxley (who doesn’t remember creating it, apparently).
Initially, Simon thought of calling his creation “Octopuss” (combination of octopus and pussycat) to represent how complex code combines can create peculiar things.

In the end, GitHub decided to go with Octocat (for obvious reasons).
Part 3
Setting-upGit and GitHub
(the right way)
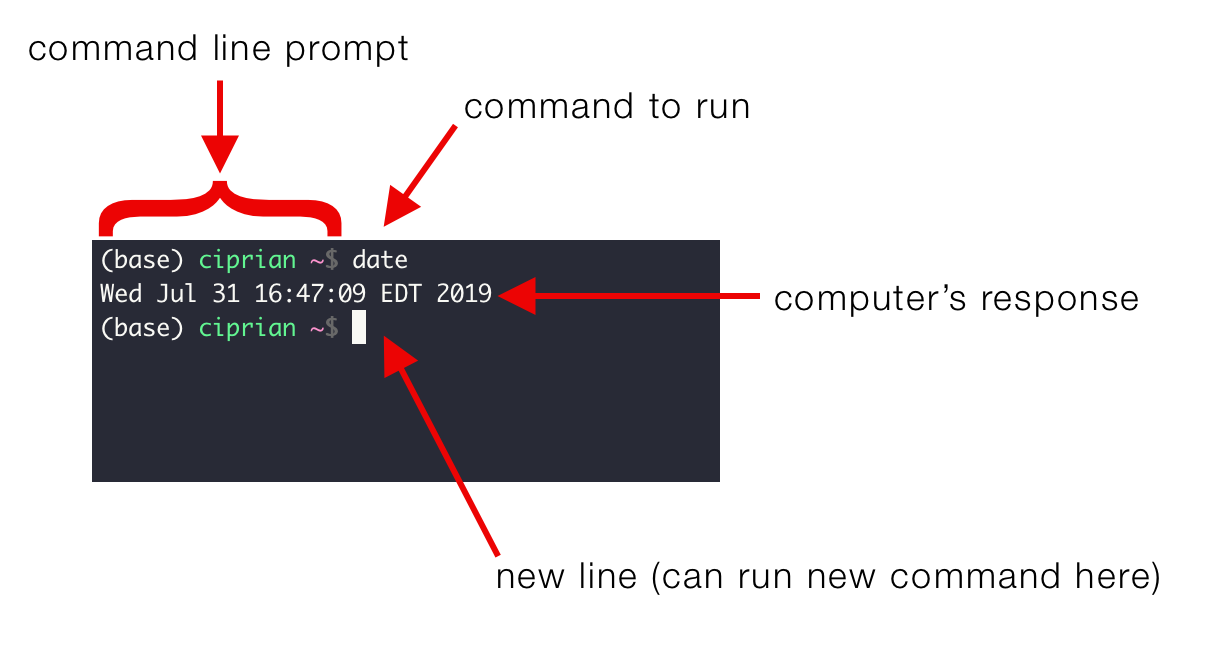
The shell
The shell is a program on your computer whose job is to run other programs.
Also known as: terminal, command line, console or bash
In research departments, you usually see this program when working on a server (that does not have a GUI client).
Even if you do most of your Git operations via a client (e.g., RStudio or GitHub), you will sometimes need tp work in the shell.
As you get more comfortable with Git, you might even prefer to do more and more via the shell.
So, let’s get acquainted…
Opening the shell
It is often handy to launch a shell from RStudio, hear me out.
Why? Because RStudio makes an effort to put you in a sane working directory
(the current project).
To launch a shell within RStudio: Tools > Terminal
The shell is often called the “terminal”.
One way to launch it is via Spotlight Search: hit Command⌘+Space and start typing “terminal”.
There are many possible shells you can end up in.
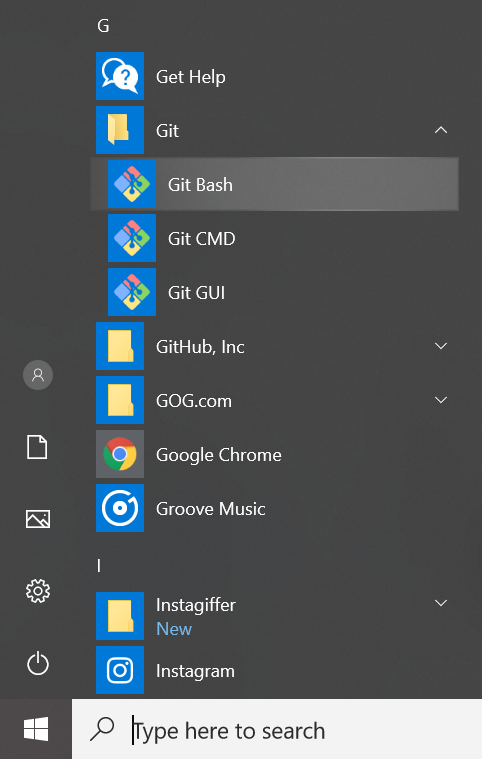
Unless you know better, use the Git Bash shell. This is the shell that ships with Git for Windows (so, you will have it on your system once you install Git).
- RStudio should automatically detect the presence of Git Bash. You can inspect and influence this via
Tools > Global Options > Terminal. - To access Git Bash outside of RStudio: open the the Windows menu, click on the “Git” folder and select “Git Bash”.
Part 4
DailyGit / GitHub workflows
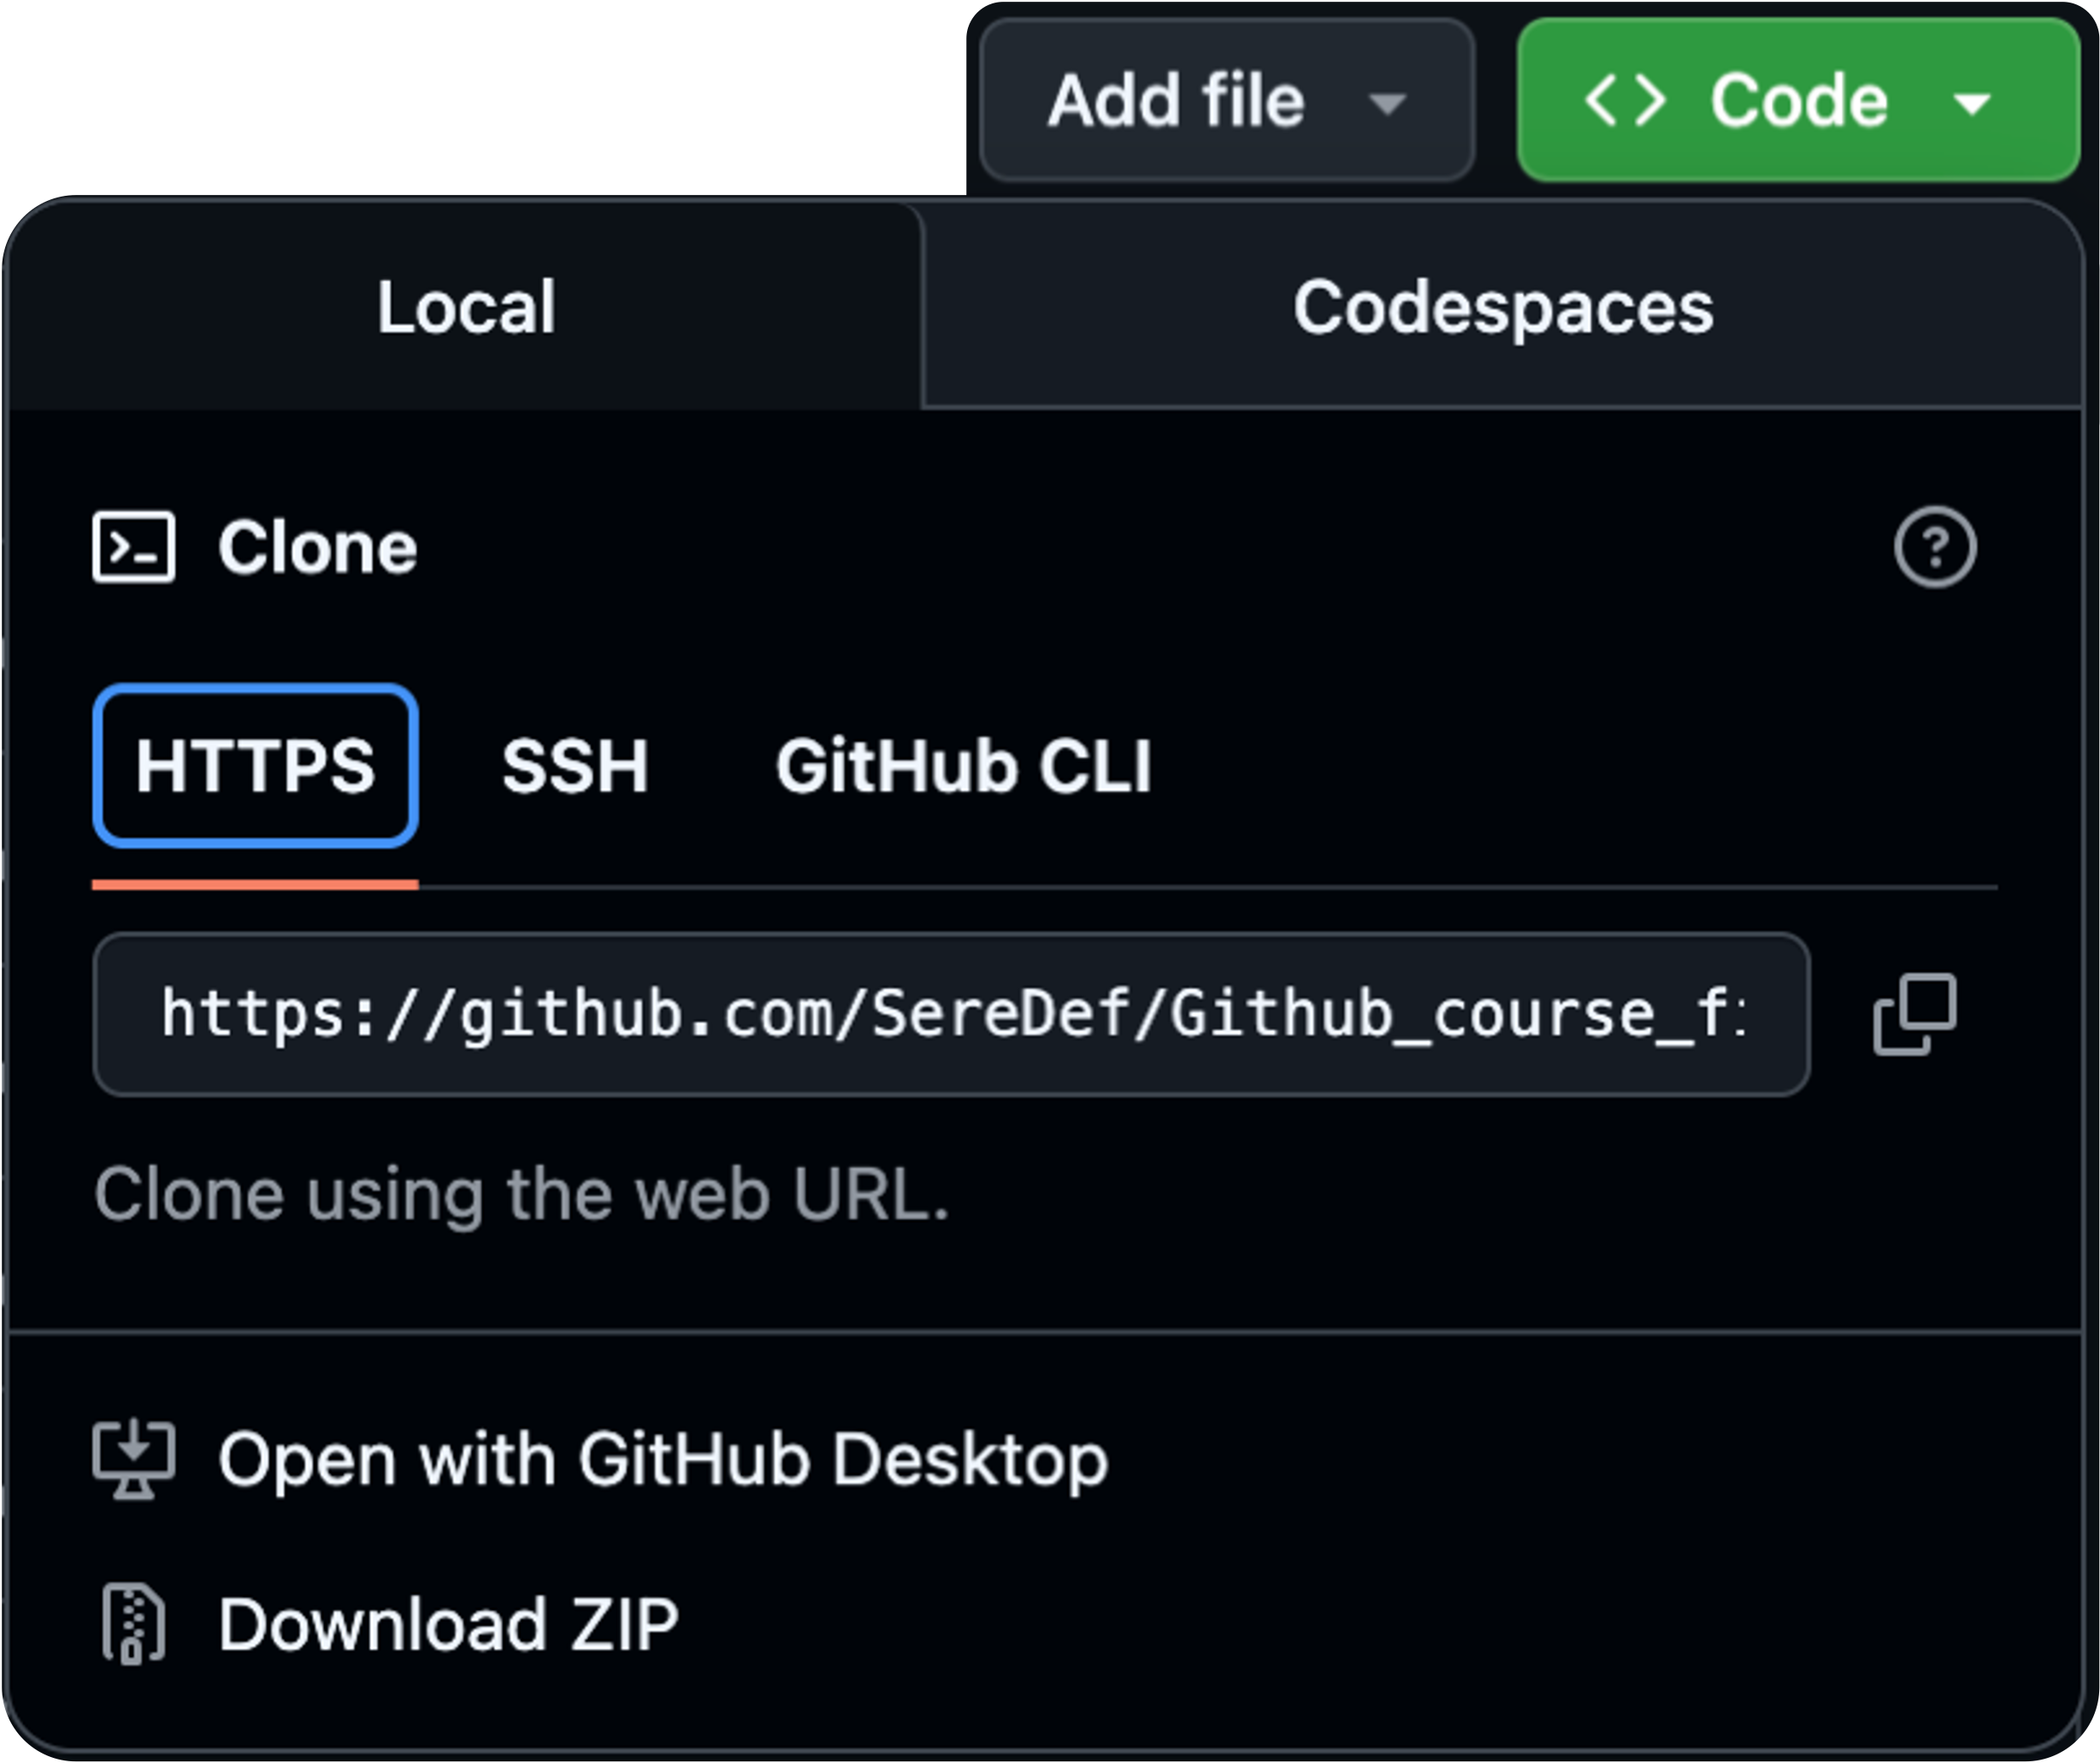
Clone your repo to your computer
Now, on the repo page, click the big green button that says
Copy a clone URL to your clipboard.
Remember when we talked about HTTPS and SSH? Here they are again.
The type of URL you copy determines the protocol GitHub will use, so if you have PAT set up, copy the HTTPS URL, if you are using SSH keys, go for SSH.
Now, you have a few ways to get this onto your computer…
Part 5
A few more tips + fun things you can do with GitHub
Build an online presence: GitHub Pages
GitHub offers static website hosting directly from your repository via GitHub Pages. With very minimal set-up you get a website that:
- is completely free (for public repositories).
You can even use your own custom domain at no extra cost - is automatically deployed: just push your code and your site updates instantly
- has built-in version control (
Githistory and rollback capability)
But… what can I use it for?
- Personal and/or lab website (e.g. see mine)
- A project website or documentation page (e.g. see this R package)
- Presetations or courses (like this one!)
- A blog
- (With a bit of extra work) an interactive dashboard
![]()
Finding stuff: let me GitHub Search that for you
Did you ever find a function that seems useful has no examples? Or is poorly documented? Wouldn’t it be nice to find functioning instances of it “in the wild”?
The GitHub Search box is just what the doctor ordered.

For example, wonder how packages on CRAN use the llply() function from plyr?
"llply" owner:cran language:RGitHub Search has loads of useful setting and options.
Finding stuff: the file finder

Whenever you are on a repo’s page, you can press t to
activate the file finder.
This is very helpful, especially when there are files tucked into lots of subdirectories.
You found it, don’t loose it
When you’re viewing a specific file, you can press y to get a permanent link to that specific file or specific line(s) inside that file.
What’s a permanent link?
Good question. This is a link that will not break, even when the file is deleted, renamed or if lines get inserted / deleted.
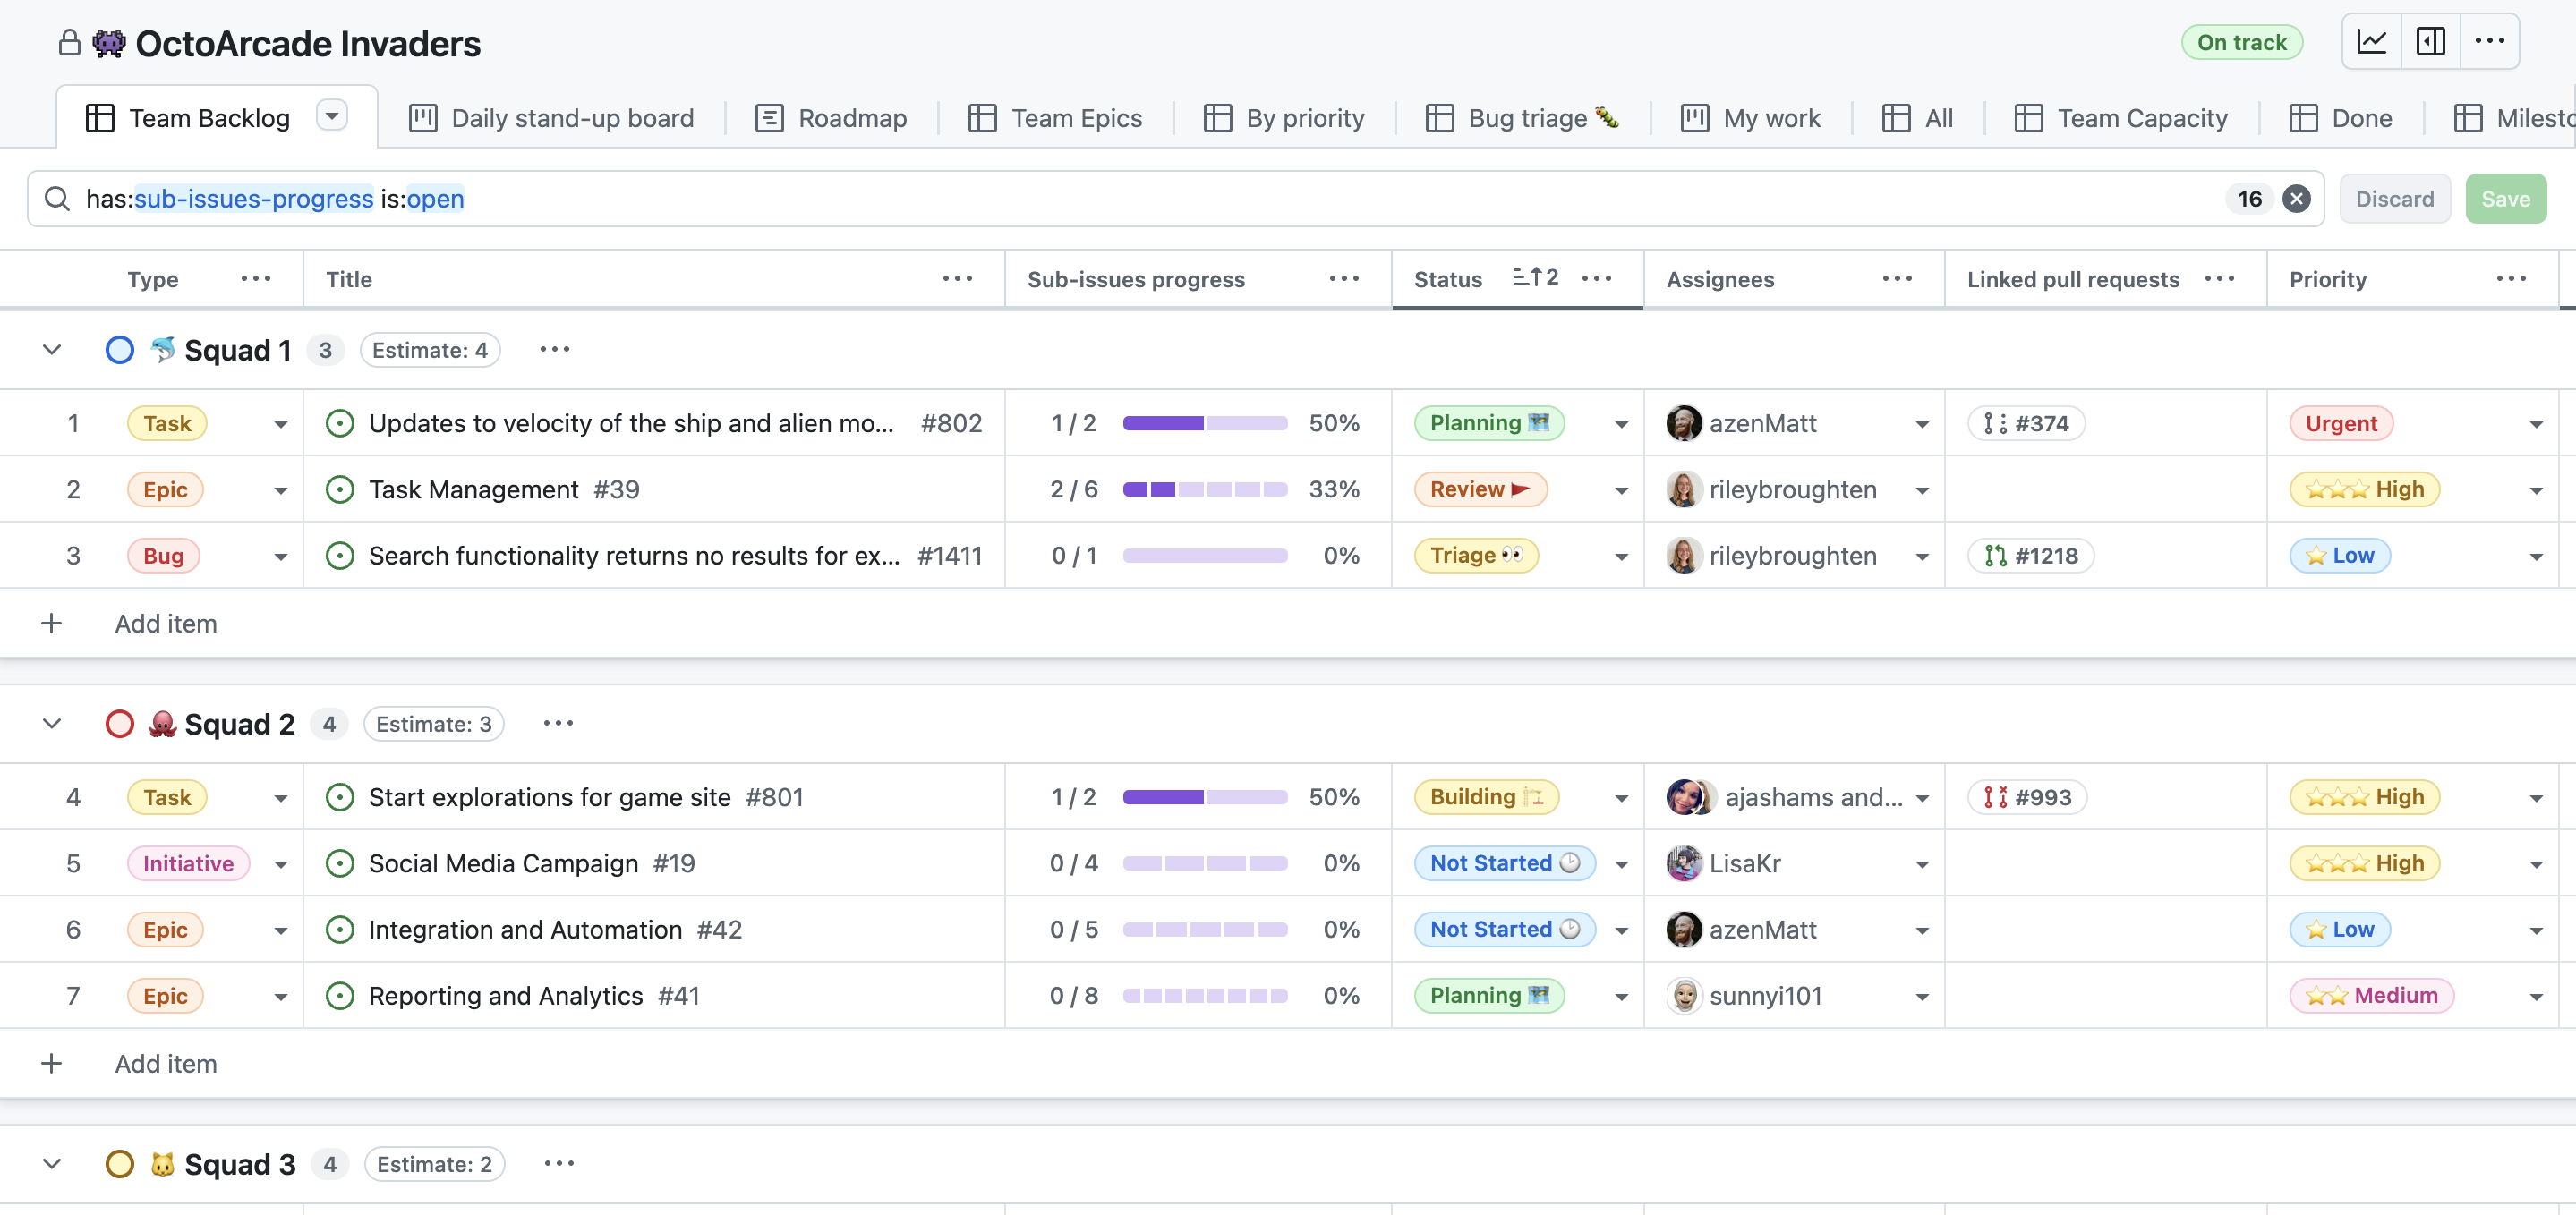
Project management with GitHub Projects
GitHub provides built-in tools for planning, tracking, and coordinating work so you can manage entire projects alongside your code and writing.
GitHub Projects sits on top of issues and pull requests as a flexible table, board, and roadmap that you can filter, sort, and group to match your workflow.